
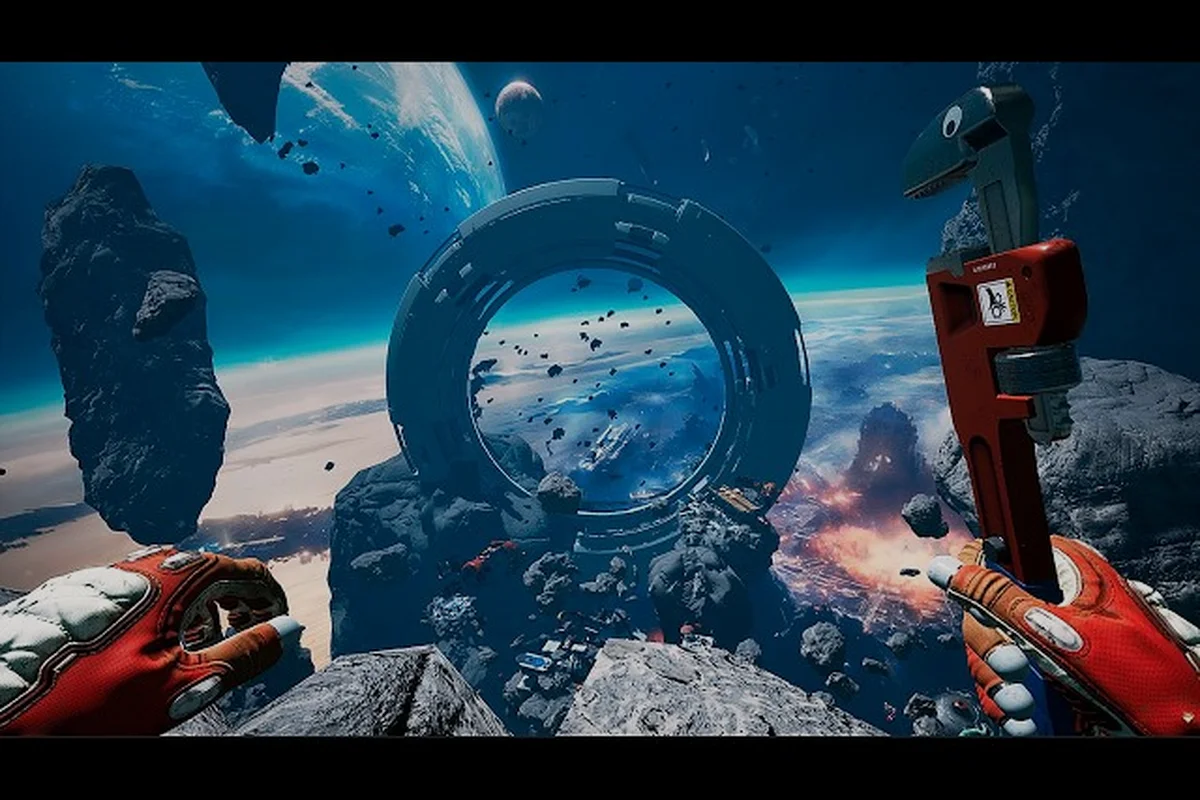
The core loop in Breathedge 2 survival gameplay is deceptively simple: you float through wreckage, grab anything that looks useful, and turn junk into tools that keep you alive for another few minutes. Oxygen drains, temperature fluctuates, and hostile drones patrol the debris fields. Understanding how these systems interact is the difference between a productive salvage run and a frozen corpse drifting into a sun. This guide breaks down the survival mechanics, combat flow, and equipment decisions that matter most during the first chapter.
Oxygen, Temperature, and the Scrap Economy
The first thing you will notice in Breathedge 2 survival gameplay is that nothing is free. Every movement, every repair, and every failed melee swing costs resources. Oxygen is the most immediate constraint, but it is not the only one. Temperature, suit integrity, and tool durability all compete for the same pile of scrap you pulled from a broken airlock.
According to the official Breathedge 2 Steam page, the game centers on an "ocean of duct tape, tons of wreckage, and the Man's remarkably capable hands" that turn garbage into useful contraptions. That description is not flavor text. The scrap economy is the foundation of every other system. If you understand what to salvage first, you will rarely find yourself suffocating or freezing.
| Resource Priority | Why It Matters | Early Game Source |
|---|---|---|
| Oxygen Canisters | Extends exploration time by 30–60 seconds per unit | Derelict pods, locker clusters |
| Duct Tape | Repairs suit breaches and crafts basic tools | Floating debris, maintenance panels |
| Metal Scrap | Base material for weapons and upgrades | Broken hull sections, satellite frames |
| Thermal Packs | Counteracts cold zones and emergency freezing | Heater units, exposed coolant lines |
| Wiring | Required for scanners and advanced repairs | Intact consoles, relay boxes |
The trick is not to hoard everything. Inventory space is limited, and carrying too much scrap slows you down. Players report that prioritizing oxygen and duct tape in the first hour prevents most early deaths. Metal scrap is common enough that you can leave it behind when your pack is full.
Managing Oxygen Efficiently
Oxygen is the timer that turns every salvage run into a small puzzle. You do not have a fixed map of oxygen refill points, so you need to create your own. The best approach is to establish a breathable pocket near a dense cluster of wreckage. That means repairing a small airlock or finding a pressurized module where you can top off without flying back to your main base.
The first major upgrade you should chase is a larger oxygen tank. It does not make the game easier; it makes the game possible. With the base tank, you get roughly 90 seconds of safe movement. That is enough to cross a small debris field but not enough to fight more than one or two enemies. After the upgrade, you can push into deeper wreckage without panicking.
Temperature works as a hidden multiplier. Cold zones drain oxygen faster, which means a thermal pack can effectively extend your air supply even though it does not add oxygen. Veteran players call this the cold sink rule: if your suit temperature drops below the safe threshold, every action costs more oxygen. Warm up before you explore, not after you start shivering.
The Breathedge 2 Combat System: Positioning Over Button Mashing
The Breathedge 2 combat system is not a first-person shooter. It borrows from survival games where positioning, resource commitment, and retreat are more important than raw aim. Most fights happen in zero gravity, which means you are moving in three dimensions while your enemy does the same. That changes how you think about cover, range, and escape routes.
The first thing to internalize is that combat is a resource tax. Every repair, every reload, and every melee swing consumes materials you could use for exploration. If a fight costs more scrap than the loot you recover from it, you lost the engagement even if you survived. This is why experienced players avoid combat unless an enemy is guarding a specific blueprint or blocking a critical path.
Ranged vs. Melee: When to Switch
The Breathedge 2 weapons list is small early on, which forces you to make deliberate choices. Melee is cheap but risky. Ranged is safer but consumes ammunition that you must craft or find. Neither option is universally better; the context decides.
| Combat Style | Resource Cost | Risk Level | Best Use Case |
|---|---|---|---|
| Improvised Melee | None (durability only) | High | Single weak enemy, surprise attacks |
| Crafted Melee | Low (repair cost) | Medium | Clearing tight corridors, saving ammo |
| Basic Ranged | Medium (ammo) | Low | Kiting patrols, hitting weak points |
| Upgraded Ranged | High (rare ammo) | Very Low | Boss-type enemies, emergency defense |
The Breathedge 2 melee combat loop rewards patience. You want to drift in, land one or two hits, and boost away before the enemy retaliates. If you commit to a full combo, you will take damage that costs more duct tape than the fight was worth. Players describe melee as a rhythm game with oxygen: hit, reposition, hit, reposition, then leave.
Enemy Behavior and the Breathedge 2 Enemies List
The Breathedge 2 enemies list is not huge in the early access build, but each enemy type forces a different response. The most common threats are automated drones and malfunctioning security turrets. Both are predictable once you learn their patterns, but they punish greed.
| Enemy Type | Attack Pattern | Weakness | Recommended Response |
|---|---|---|---|
| Patrol Drone | Slow circling, short laser burst | Exposed battery core | Melee rush after the burst ends |
| Security Turret | Fixed arc, high damage | Power relay on the rear | Flank using debris as cover |
| Ruptured Automaton | Erratic charge, self-repair | Overheats after 3 charges | Bait the charge, then focus fire |
| Salvage Hound | Fast melee lunge | Sensitive to loud noise | Ranged kiting or early retreat |
Knowing the Breathedge 2 enemies list is only half the battle. The other half is recognizing when a fight is optional. Most early enemies drop basic scrap, not unique blueprints. If you are low on oxygen or duct tape, flying away is a legitimate strategy. The game does not reward you for clearing every hostile you see.
How to Fight Effectively in Zero Gravity
Learning how to fight in Breathedge 2 means unlearning habits from ground-based shooters. In zero gravity, you cannot strafe behind cover the same way, and enemies do not have a clear "front" or "back" unless you create one. The best players treat combat as a series of controlled drifts rather than a duel.
Start every engagement by identifying your exit vector. That is the direction you will boost if the fight goes badly. If you do not have a clear escape route, do not start the fight. The second step is to create a debris anchor — a chunk of wreckage you can grab or circle around to break line of sight. This matters more than your weapon choice.
The Three-Pass Rule
One of the most practical Breathedge 2 combat tips is the three-pass rule. On the first pass, you fly past the enemy to trigger its attack and observe the pattern. On the second pass, you land damage while the enemy is recovering. On the third pass, you either finish the target or disengage entirely. Committing to a fourth pass usually means you are overextending.
This rule works because enemies have recovery windows that are consistent across encounters. A patrol drone takes about two seconds to reacquire its target after a laser burst. A security turret needs nearly four seconds to rotate back to its starting arc. Those windows are your damage phases. If you cannot land meaningful damage in that time, your weapon is underleveled for that enemy.
The Breathedge 2 combat system also rewards environmental awareness. Explosive canisters, loose panels, and damaged power conduits can all be triggered to damage enemies without spending your own resources. Community reports describe players clearing entire drone clusters by detonating a single unstable fuel cell and letting the chain reaction do the work.
Crafting Your Arsenal: The Breathedge 2 Weapons List in Practice
The Breathedge 2 weapons list is not about collecting guns. It is about having the right tool for the right salvage run. Each weapon has a purpose, and carrying the wrong one is worse than carrying none because it wastes inventory space.
The first weapon you will likely craft is an improvised wrench or pry bar. It doubles as a melee weapon and a repair tool, which makes it the most slot-efficient item in the early game. The second is a basic projectile launcher — effectively a nail gun that fires scrap bolts. It is inaccurate, but it lets you damage enemies without closing to melee range.
| Weapon | Damage Tier | Crafting Cost | Role |
|---|---|---|---|
| Makeshift Wrench | Low | 2 Metal Scrap, 1 Duct Tape | Tool + emergency melee |
| Scrap Bolt Launcher | Medium | 3 Metal Scrap, 2 Wiring | Early ranged option |
| Plasma Cutter | Medium-High | 4 Metal Scrap, 1 Power Cell | Armor penetration, salvage cutting |
| Overcharged Arc Gun | High | Rare blueprint + Power Cell | Crowd control, turret busting |
The upgrade path matters more than the base weapon. A reinforced wrench with a weighted head does significantly more melee damage than the standard version, and it costs only one extra piece of scrap. Similarly, upgrading the bolt launcher's magazine reduces reload frequency, which directly improves your damage output in long fights.
The Melee Commitment Threshold
A recurring question from new players is whether melee is viable at all. The answer is yes, but only if you understand the melee commitment threshold. That is the point where staying in melee range for one more hit will cost you more health than the hit deals. For most early enemies, the threshold is two hits. Land two, then boost away. If the enemy is still alive, re-engage after its attack pattern resets.
The beginner guide for Breathedge 2 goes deeper into early game prioritization, but the combat lesson is simple: melee is a supplement, not a primary strategy. Use it to finish weakened enemies or to conserve ammo against isolated targets. Do not try to melee a turret unless you have already disabled its power relay.
Survival Priorities and Long-Term Planning
Breathedge 2 survival gameplay is not just about staying alive minute to minute. It is about building a buffer so that future runs are easier. The first few hours feel tense because you are always one mistake away from death. After you establish a few key upgrades, that tension shifts from "can I survive?" to "what should I bring back?"
The most important early upgrades are not weapons. They are suit systems. A better oxygen tank, improved insulation, and a faster boost module all do more for your survival than any gun. That is because combat is avoidable, but the environment is not. You can fly around a drone, but you cannot fly around a cold zone without taking damage.
| Upgrade Priority | Impact on Survival | Relative Cost |
|---|---|---|
| Oxygen Tank Mk II | High — extends every run | Moderate |
| Thermal Lining | High — reduces cold damage | Low |
| Boost Efficiency | Medium — improves escape | Moderate |
| Melee Damage | Low-Medium — situational | Low |
| Ranged Ammo Capacity | Medium — more sustain | High |
The community consensus, based on early access reports, is that new players overinvest in weapons and underinvest in mobility. A faster boost module lets you disengage from fights you cannot win, which saves more resources than a marginally better gun. The survival checklist for progression covers this priority order in more detail.
The Scrap Discipline Loop
The hidden skill in Breathedge 2 survival gameplay is scrap discipline. That means knowing when to stop salvaging and start returning. It is easy to spot one more wrecked module, one more glowing container, and push just a little further. That is how runs end. The loop is: set a goal, gather the specific materials for that goal, and return. Anything extra is a bonus, not a requirement.
Players who follow this discipline report far fewer deaths than those who free-roam. The reason is simple: a focused run takes less time, which means less oxygen used, which means fewer emergencies. You can always go back out. The debris fields are not going anywhere.
Frequently Asked Questions
Is Breathedge 2 combat mandatory for progression?
Most combat encounters are avoidable if you plan your route. Some blueprints and story objectives sit behind hostile patrols, so you will need to fight occasionally. Learning the Breathedge 2 combat system early makes those forced encounters manageable without burning through your entire scrap reserve.
What is the best early weapon in Breathedge 2?
The Scrap Bolt Launcher is the most reliable early weapon because it deals damage from a safe distance. It is not flashy, but it lets you kite patrol drones and turrets while you learn their patterns. Pair it with a reinforced melee tool for close-range finishes.
How do I fight security turrets without dying?
Flank the turret using debris as cover, then target the power relay on its rear panel. The turret cannot rotate quickly enough to track you if you stay mobile. A single plasma cutter burst or three scrap bolts to the relay will disable it permanently.
Does melee combat use ammunition?
No, melee weapons only consume durability. You can repair them with scrap and duct tape. This makes Breathedge 2 melee combat a good fallback when ammunition is scarce, but the risk of taking damage is higher because you must close distance first.
Can I respec or change my weapon upgrades?
There is no formal respec system in the current early access build. Upgrades are permanent, so choose carefully. Community testing suggests the developers may add a refund option in a future update, but nothing is confirmed as of August 2026.